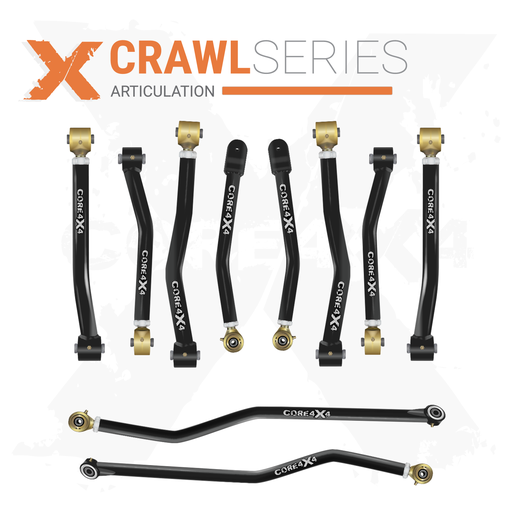
The Jeep JL Wrangler is already capable off the showroom floor, but if you want to unlock real trail performance, the suspension is the first thing to address. In this video, Spence and Gabby kick off a full Crawl Series build on a friend’s JL Rubicon by installing Core 4x4 front upper and lower control arms along with taller springs. This is the first installment in a multi-part series that will eventually include all eight control arms, both track bars, a drag link, end links, and a spring upgrade from 2.5 inches to 3.5 inches of lift.
Fitment: Jeep Wrangler JL 2018+ & Gladiator JT 2020+
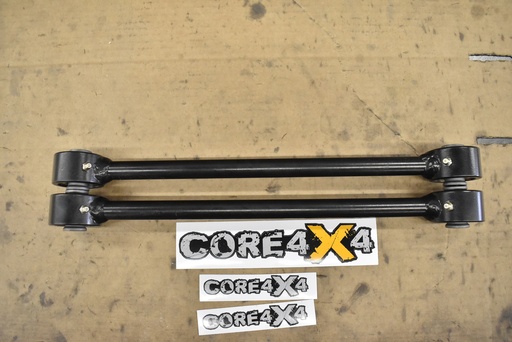
What We Are Installing

This build is a Crawl Series upgrade on a JL Rubicon that came in with a 2.5-inch lift. The plan for this first session is to replace the front upper and lower control arms and swap in taller 3.5-inch dual-rate coil springs. Here is what goes in today:
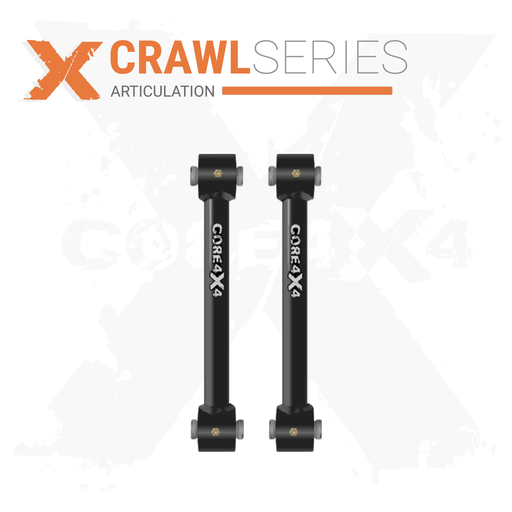
- Core 4x4 Crawl Series front lower control arms — adjustable, with Johnny Joint rod ends
- Core 4x4 Crawl Series front upper control arms — adjustable, with bends for frame and tire clearance
- Rock Crawler 3.5-inch dual-rate coil springs — stepping up from the existing 2.5-inch lift
- Grade 8 hardware — included with every kit as an option if your factory bolts are rusted
Tools Required
- Floor jack and jack stands (or a lift)
- Socket set
- Torque wrench (capable of 250 ft-lbs for jam nuts)
- Crow’s foot wrenches (for jam nuts)
- Tape measure
- Screwdriver or bolt (for adjusting joint alignment)
- Small piece of wood (for holding the arm while tightening jam nuts)
- Penetrating fluid
- Spray paint (for touchup after any trimming)
Step 1: Get the Jeep in the Air and Strip the Front End

First priority is getting the vehicle up and secured. A lift makes this easier, but jack stands work fine at home. Since this build involves changing arm length and swapping springs, everything on the front axle comes off:
- Remove all four front control arms (both uppers and both lowers)
- Disconnect the track bar
- Disconnect the front shocks so the axle can droop enough to remove the springs
Pro tip: If you are matching your existing arm lengths one-for-one, you can replace them a pair at a time. But when you are changing lengths — like going from a 2.5-inch to a 3.5-inch lift — it is easier to remove everything at once so the axle can drop freely.

Step 2: Set the Control Arm Lengths

With the old parts off, it is time to set the new arms to the correct starting length. For this JL going from 2.5 inches to 3.5 inches of lift:
| Control Arm | Starting Length (Eye to Eye) |
|---|---|
| Front lowers | 24.5 inches |
| Front uppers | 20 3/8 inches |
These are starting measurements. The lower control arms set your wheelbase and the upper control arms help you dial in caster. For this Jeep, you are shooting for about six degrees of caster. The alignment shop will fine-tune the final numbers, but starting at these lengths gets you close enough to drive safely to the shop.

Getting Parallel Joints Right
The Crawl Series arms have bends in them, which makes measuring trickier than a straight arm. The key is to make sure the joints at each end are parallel before you measure:
- Set the arm flat on a table
- Look underneath to check for gaps — both joints should sit flush
- If a joint is angled, use a screwdriver or bolt to adjust it until it is parallel
- Measure both sides of the arm to confirm — if you get the same number on both sides, the joints are parallel and your measurement is accurate
Not sure where to start? Core 4x4 has measurement charts for every lift height and every Jeep. Reach out to sales@core4x4.com for the chart that matches your setup.
Step 3: Install the Control Arms

With the lengths set, the arms bolt into the Jeep. Start with the uppers to get something holding the axle in place, then do the lowers. Having a second person helps position the axle as you line things up.
Control Arm Orientation
On the Crawl Series arms, orientation matters. Here is how they go in:
- Lower arms: The adjusting side (Johnny Joint) goes at the frame. The bend goes inward for tire clearance.
- Upper arms: The inward bend provides frame clearance. All bends face inside the frame rail.
- Zerk fittings: Make sure the grease zerks are accessible after installation. On the uppers, a 90-degree zerk pointed forward lets you grease from the front of the Jeep.
All kits come with grade 8 hardware as an option. You can reuse your factory nuts and bolts if they are in good shape, or use the new hardware if your originals are rusted.
Step 4: Swap the Springs

With the control arms hand-tight, the next step is getting the new 3.5-inch dual-rate coils in. These are taller than the 2.5-inch springs coming out, so fitting them requires some extra room between the axle and chassis. There are two approaches:
- Option A: Remove the bump stops to gain clearance — this is the easier method
- Option B: Drop the crossmember to create more separation — this is what Spence and Gabby did because the driveshaft was limiting axle droop
Either way works. Once the springs are seated, reconnect the shocks and move on to torquing everything down.
Step 5: Torque Specs
With everything assembled, torque the fasteners to spec. This is critical — especially the jam nuts.
| Fastener | Torque Spec |
|---|---|
| Lower control arm bolts | 150 ft-lbs |
| Upper control arm bolts | 65 ft-lbs |
| Lower jam nuts | 250 ft-lbs |
| Upper jam nuts | 200 ft-lbs |
Important: If your axle-side bushing is a factory rubber bushing (not a Johnny Joint), do not torque it with the vehicle in the air. The crush sleeve is fused inside the rubber, so if you torque it unloaded and then set the Jeep down, the bushing will have a preload that causes premature failure. Torque everything else in the air, then set the Jeep on the ground at ride height and torque that axle-side rubber bushing last.
Tightening Jam Nuts
Getting 250 ft-lbs on a jam nut is not easy. A crow’s foot wrench is the best tool for the job. To keep the arm from spinning while you tighten, wedge a small piece of wood between the joint and the bracket. This holds the arm steady and keeps the joint centered. Re-check your jam nuts after the first few hundred miles — they should be verified and retightened if needed.
Step 6: Track Bar Prep

On some JL and JT front axles, the axle-side track bar bracket needs minor trimming to fit the Core 4x4 track bar. A die grinder or angle grinder takes care of this in a few minutes. Hit the bare metal with spray paint afterward to prevent rust.
For this build, the track bar was not installed during this session. With the lift height change and no steering components on yet, it is much easier to align the track bar with the tires on and the Jeep on the ground. That will happen in the next video in the series.
The Result
With the front upper and lower Crawl Series control arms installed and the springs swapped, the JL Rubicon is already sitting at its new 3.5-inch lift height. The red powder-coated arms look great underneath and match the Rubicon accent details on the rest of the Jeep. Remaining work in the series:
- Rear control arms (four more)
- Front and rear track bars
- Drag link
- End links
- Final alignment
Frequently Asked Questions
Related Content
- Core 4x4 JL Wrangler Crawl Series Front Control Arms — the kit used in this install
- Watch the Full Install Video — this guide covers the first part of a multi-video JL Crawl Series build
Fitment: Jeep Wrangler JL 2018+ and Gladiator JT 2020+. Questions? sales@core4x4.com | (385) 375-2104