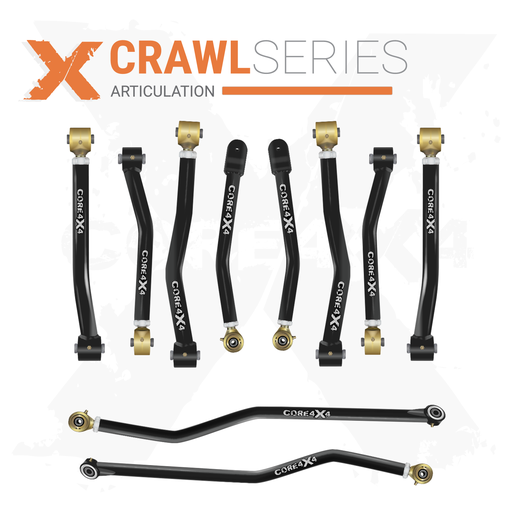
If you drive a JL Wrangler on trails, rocks, or Moab slickrock, the factory rubber-bushed rear control arms and track bar are the weak link in your suspension. Limited articulation, cracking bushings, and fixed arm lengths that cannot compensate for a lift or spring change all hold back what the JL platform is capable of. The Core 4x4 Crawl Series rear control arms and track bar for the JL are built with 5/16-inch wall tubing and Johnny Joints at both ends — the thickest, most flexible option in the Core 4x4 lineup, designed specifically for serious off-road use.
In this video, Gabby and Spence from Core 4x4 install the full Crawl Series rear suspension kit on a JL Wrangler four-door that sees regular trail duty in Moab and doubles as a daily driver. This is the second episode in a complete build series — in the first video they installed the front control arms, springs, and prepped the front axle. Here they cover the rear: removing the factory arms, dropping the axle for taller springs, setting arm lengths, installing the rear track bar, and bolting on new Crawl Series end links.
Fitment: Jeep JL Wrangler 2018–present (2-door and 4-door) | Rubicon and non-Rubicon

The Crawl Series: Why It Is the Top Tier for the JL
Core 4x4 offers multiple tiers for the JL Wrangler. The Crawl Series (formerly called tier four) is the most capable option they make. Here is what sets it apart:
- 5/16-inch wall tubing — thicker than any other tier in the lineup, built to handle rock impacts, hard landings, and side-loading on off-camber terrain
- Johnny Joints at both ends — full articulation in every direction with zero binding, no bushing preload, and no need for a strict grease schedule
- Double-threaded adjustability — both ends thread in and out so you can fine-tune arm length while the arms are on the vehicle
- Adjusting end goes to the body side — on the control arms the adjuster faces the frame for easy access. On the track bar, the adjusting end goes to the axle side for clearance around the exhaust
Spence chose the Crawl Series for this JL because the Jeep goes to Moab regularly and is also daily driven. The 5/16-inch wall tube and dual Johnny Joints give the durability and flexibility this kind of use demands. If you manage to bend or break one of these, as Spence says in the video, you are probably in a lot more trouble than just a broken control arm.

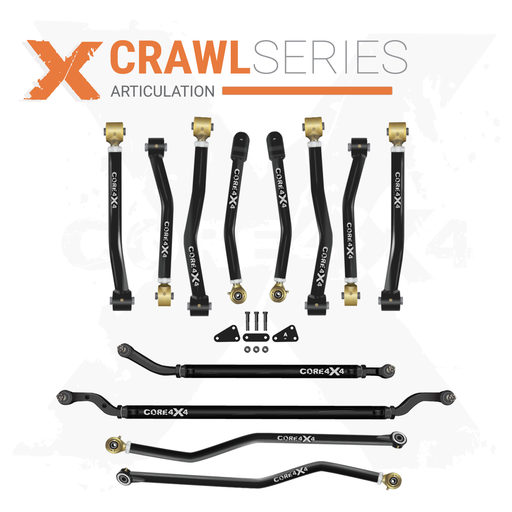
The Kit: What You Are Installing
The full rear Crawl Series kit for this JL install includes:
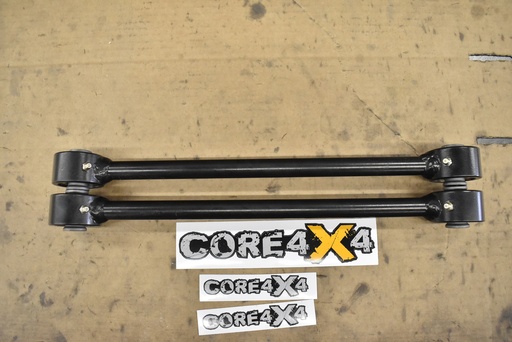
- Two lower rear control arms — Crawl Series, 5/16-inch wall, Johnny Joints at both ends, double-threaded adjustable
- Two upper rear control arms — same construction, same adjustability
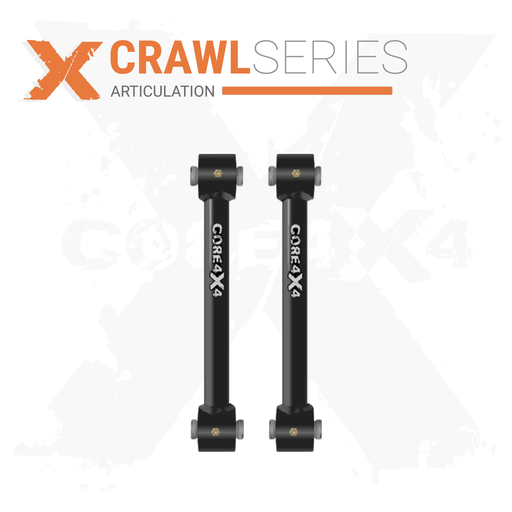
- One rear track bar — Crawl Series, adjustable, with the adjusting end oriented to the axle for exhaust clearance
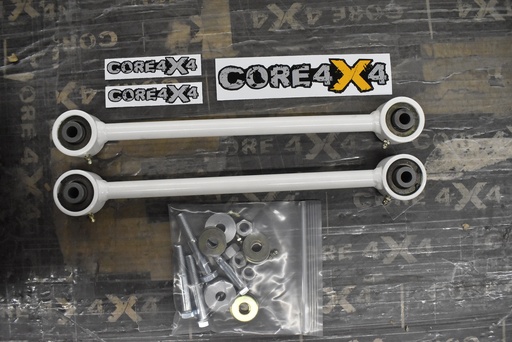
- Crawl Series end links — Johnny Joints on both sides for more flexibility and durability than factory rubber end links
- Hardware kit — upgraded bolts and hardware (optional purchase, factory hardware also works)
They are also installing taller rear springs as part of this build to raise the ride height, which requires dropping the axle further than a control-arm-only swap.

Removing the Factory Rear Suspension
Before installing the new arms, the entire factory rear suspension needs to come apart. Because this build also includes taller springs, Spence and Gabby disconnected more than you would for a simple arm swap:
- Wheels off
- Upper and lower factory control arms removed
- Factory track bar removed
- Rear shocks disconnected
- E-brake cable disconnected
- Sensors and breather tube disconnected
- Axle dropped to remove factory springs and install taller replacements
Note: If you are only replacing the control arms and track bar (no spring change), you do not need to disconnect the e-brake, sensors, or breather tube. Those steps are only necessary when dropping the axle far enough to swap springs.

Setting Arm Lengths for the JL Rear
Since this JL is getting a 3.5-inch lift on a four-door, the arm lengths need to be set longer than factory. Spence gives specific starting points for the rear:
| Component | Starting Length (eye to eye) |
|---|---|
| Lower rear control arms | 20-1/4 inches (stock starting point: 20 inches) |
| Upper rear control arms | 18 inches (stock starting point: 17-1/2 inches) |
Spence went slightly longer than the base dimensions because the owner prefers a stretched look with the taller springs. The double-threaded design means you can dial arm length in or out after installation to fine-tune ride quality and pinion angle.
How to Measure Adjustable Arms Correctly
When setting the length of a double-threaded adjustable arm, the Johnny Joints at each end must be parallel — both facing the same direction. If one joint is cocked or rotated, your eye-to-eye measurement will be off. Spence recommends:
- Use a big screwdriver, bolt, or vise to rotate any cocked joint until it lines up with the other end
- Set both arms on a flat surface (table or workbench)
- Check for gaps under the joints — if both ends sit flat with no rocking, the joints are parallel
- Pull your measurement at that point
- Lock the jam nuts to hold the length during install

Installing the Rear Control Arms and Track Bar
With the new springs in place and the axle repositioned, Spence bolts in the new Crawl Series arms. The adjusting end faces the body (frame) on the control arms and the axle on the track bar. All four control arms and the track bar bolt directly into the factory mounting points with no modification required.
After the arms and track bar are in, Spence installs the Crawl Series end links. These have Johnny Joints on both sides (top and bottom) instead of factory rubber bushings, which allows significantly more articulation and eliminates the binding that rubber end links create at full droop or compression.

Torque Specs for the JL Rear
With everything in place, torque all hardware to spec. Here are the values Spence uses for the JL rear:
| Component | Torque Spec |
|---|---|
| Control arm bolts (all four arms) and track bar | 125 ft-lbs |
| End link bolts | 65 ft-lbs |
| Upper arm jam nuts | 200 ft-lbs |
| Lower arm jam nuts | 250 ft-lbs |
If you purchase the Core 4x4 hardware kit, use those values. If you reuse factory hardware, follow factory torque specs for the bolts — but the jam nut torque values remain the same regardless of which bolt kit you use.
Pro tip: Because Johnny Joints use independent crush sleeves, you can torque everything with the Jeep on the lift at full droop. The crush sleeve is not fused to the joint, so when you set the Jeep down, it finds its own neutral position with zero preload. This is a major advantage over rubber or polyurethane bushings, which must always be torqued at ride height.

What Comes Next: Front Finish, Steering, and Alignment
This video covers the rear only. In the next episode of this JL build series, Spence and Gabby will finish the front — installing the steering (drag link), making adjustments to the front track bar, and getting the Jeep ready for a professional alignment. The rear track bar may also need minor tweaking once the wheels are on and the Jeep is on the ground, which they will address in that next video.
Tools Required
- Floor jack and jack stands (or a lift)
- Socket set (factory bolt sizes for your year model)
- Torque wrench (up to 250 ft-lbs minimum)
- Ratcheting wrenches (for tight spaces around the axle)
- Large crescent wrenches or pipe wrenches with cheater bar (for jam nuts)
- Tape measure (for setting eye-to-eye arm lengths)
- Penetrating fluid (PB Blaster or similar)
- Flat-blade screwdriver or bolt (for aligning Johnny Joints during measurement)
- Spring compressor (if replacing springs at the same time)
Why Upgrade Your JL Wrangler Rear Suspension?
The factory JL rear control arms and track bar use rubber bushings that limit articulation, wear out over time, and cannot be adjusted for a lift or spring change. Upgrading to the Crawl Series solves all three problems:
- Full articulation: Johnny Joints rotate freely in all directions without binding, giving you significantly more wheel travel on rocks and uneven terrain.
- Adjustability: Double-threaded arms let you dial in the exact length for your lift height, pinion angle, and wheelbase. No cutting, no shimming.
- Durability: 5/16-inch wall tubing and Rock Jock Johnny Joints handle rock impacts, hard landings, and sustained off-road abuse that would destroy factory rubber bushings.
- No preload: Independent crush sleeves mean you can torque at any suspension position without creating bushing memory or premature wear.
Frequently Asked Questions
Related Content
- Why You Need Control Arms — educational overview of what control arms do and why upgrades matter
- JL Wrangler Rear Control Arm Set (Crawl Series) — the rear arm kit installed in this video
- JL Wrangler Rear Track Bar (Crawl Series) — the rear track bar installed in this video
Shop JL Wrangler Parts
Fitment: Jeep JL Wrangler 2018–present (2-door and 4-door, Rubicon and non-Rubicon). Questions: sales@core4x4.com | (385) 375-2104